W

Plum Tree: Step-by-Step Guide

It's easier than you might think! Learn how to grow a plum tree from seed, a rewarding journey that connects you to the natural world. From choosing the right seed to understanding the unique challenges and secrets of plum tree propagation, this guide will provide you with the knowledge and confidence to nurture your own plum tree from the ground up. Plum trees can reach heights of 15 to 20 feet, with a spread of about 15 feet, providing both beauty and delicious fruit. Let's embark on this exciting adventure together!
a magnificent plum tree and fruit
This article was written by EB React on 01/07/2024
Share On:
share on Twitter

Choosing the Right Plum Seed

Choosing the Right Variety

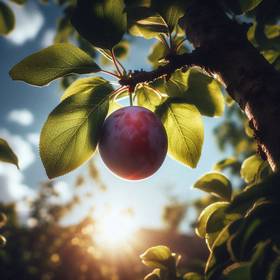
Choosing the right variety of plum tree is crucial for successful growing and a bountiful harvest. Consider your climate, space limitations, and desired fruit characteristics. For warm regions, varieties like the Italian Prune thrive, while cooler climates favor the hardy Damson. If space is limited, opt for compact varieties like 'Mount Royal' or 'Santa Rosa'. Research specific varieties to find the ideal match for your needs, ensuring a delicious and rewarding experience with your plum tree.

Planting and Care

Once your plum seeds have sprouted, it's time to nurture their growth. Plant them in a pot filled with well-draining potting mix, ensuring the roots have ample space to spread. Place the pot in a sunny location, receiving at least 6 hours of sunlight daily.

Water regularly, keeping the soil moist but not soggy. As the seedling grows, you can gradually introduce it to outdoor conditions, hardening it off by exposing it to increasing amounts of sunlight and wind. With proper care, your young plum tree will flourish and eventually bear delicious fruit.

Common Problems and Solutions

While growing a plum tree from seed is rewarding, it can present challenges. One common issue is root rot, caused by overwatering or poor drainage. Ensure the soil is well-draining and water only when the top inch of soil is dry. Another problem is pests like aphids or fruit flies.

Utilize organic pest control methods like insecticidal soap or introducing beneficial insects. Diseases like brown rot can affect fruit. Practice good sanitation, remove infected fruit promptly, and consider organic fungicides. By addressing these common issues proactively, you can cultivate a healthy and thriving plum tree.

Preparing the Seed for Planting

plum trees

Cleaning and Stratifying Plum Seeds

Before planting your plum seeds, they need a little preparation. First, clean them by removing any remaining pulp and rinsing them thoroughly. Then, you'll need to stratify the seeds, mimicking the natural winter conditions they need to germinate.

This involves exposing them to cold temperatures. Place the cleaned seeds in a moist paper towel or a container with damp vermiculite. Store them in the refrigerator for 12-16 weeks, checking periodically for signs of sprouting. Once they show signs of growth, they're ready for planting.

Choosing the Right Planting Medium

Choosing the right planting medium is crucial for successful plum seed germination. A loose, well-draining mix is ideal, allowing for proper airflow and moisture retention. A seed starting mix or general-purpose potting mix designed for seed germination works well. Vermiculite, a lightweight, porous material, provides excellent drainage and moisture retention. Coco coir, derived from coconut husks, offers good aeration and moisture retention. Avoid heavy soil, as it can compact and hinder seed germination.

Starting Seeds Indoors or Outdoors

Once your plum seeds have undergone stratification, you have the option of starting them indoors or outdoors. Starting indoors provides greater control over the environment. Sow seeds in small pots or seed trays filled with a seed starting mix, 1/4 inch deep.

Maintain a warm temperature and consistent moisture. Starting outdoors allows seeds to acclimate to your region's conditions. Sow them directly in the ground after the last frost, 1/2 inch deep in a sunny spot with well-drained soil. Regardless of your chosen method, ensure consistent moisture and provide protection from harsh weather conditions.

Nurturing Your Young Plum Tree

Providing Sunlight and Water

Young plum trees crave sunshine to thrive. Ensure your seedling receives at least 6 hours of direct sunlight daily, ideally in a warm, well-lit location. Water regularly, keeping the soil consistently moist but not waterlogged. Avoid overwatering, as this can lead to root rot.

Monitor the soil moisture by touching the top inch; if it feels dry, water deeply. Consistent sunlight and proper hydration will help your young plum tree develop strong roots and healthy foliage, setting the stage for a bountiful future harvest.

Protecting from Pests and Diseases

While young plum trees are relatively hardy, they can be susceptible to certain pests and diseases. Keep an eye out for aphids, fruit flies, and plum curculio, which can damage the tree and its fruit. Fungal diseases like brown rot and bacterial canker can also pose a threat.

To protect your plum tree, use natural pest control methods like insecticidal soap or introducing beneficial insects. Regular inspection and prompt action are key to keeping your young plum tree healthy and thriving.

Pruning for Healthy Growth and Fruit Production

Pruning is essential for a healthy and productive plum tree. Winter pruning, done during the dormant season, removes dead, diseased, or crossing branches. Summer pruning, done during the growing season, shapes the tree and controls growth.

Regular pruning promotes proper airflow and sunlight penetration, leading to better fruit production. Remove any new shoots growing from the trunk or branches during summer pruning. By pruning correctly, you ensure your plum tree thrives and produces delicious fruit for years to come.

Transplanting Your Plum Tree

Choosing the Right Location

Choosing the right location for your plum trees is crucial for its long-term health and productivity. Select a spot that receives at least 6 hours of full sun per day. Well-drained soil is essential to prevent root rot, so avoid areas prone to waterlogging. Plum trees prefer fertile, slightly acidic soil, but they can adapt to different conditions. Consider the size of your garden and the mature size of the plum variety you've chosen to ensure ample space for the tree to grow.

Digging the Perfect Planting Hole

When your tree reaches a suitable size, typically around 1-2 years old, it's time to transplant it to its permanent location. Dig a planting hole twice as wide as the root ball of your plum tree and slightly deeper. This provides ample space for roots to spread and thrive. Ensure the hole is dug in a well-drained spot that receives adequate sunlight. Once the hole is prepared, carefully remove the plum tree from its container, being mindful of the delicate roots.

Supporting the Tree for Stability

Once your tree of plum is planted, provide support for the young trunk to help it grow straight and prevent wind damage. Use a sturdy stake taller than the tree and secure it to the trunk with soft ties to avoid constricting the bark.

The stake should provide gentle support without restricting the tree's growth. Regularly check the ties for tightness and adjust as needed. This support will help your plum tree develop a strong and stable trunk, ensuring its healthy growth and future fruit production.

Harvesting Your Delicious Plums

plum from the tree

Picking and Storing Your Fruit

Once your plums are ripe, gently pick them from the tree, being careful not to damage the fruit or the branches. Store your fresh plums in the refrigerator for up to a week, or consider preserving them for longer enjoyment. Canning plums preserves their freshness for months, while freezing allows you to enjoy them later in the year. No matter how you choose to store them, savor the delicious fruits of your labor, a testament to your dedication in growing your own tree.

Enjoying the Rewards of Your Labor

The culmination of your efforts is a bountiful harvest of delicious plums. Savor the sweet and juicy fruit, a testament to your dedication and patience. From fresh-picked plums to jams, pies, or even dried plums, enjoy the unique flavors and benefits of your own homegrown fruit. Every bite is a reminder of the journey and the joy of nurturing your plum tree from seed to harvest.

Recognizing Ripe Plums

Knowing when your plum tree is ready to yield its harvest is crucial. Look for these signs of ripe plums: 

Color: Ripe plums will have reached their full color, often becoming darker and more vibrant. 

Texture: The plums will feel firm but slightly soft to the touch.
 
Aroma: Ripe plums will have a sweet and slightly fruity aroma. 


Once you see these signs, it's time to pick your delicious plums and enjoy the fruits of your labor!

INFORMATION

EB React / Editor

googlemap »


©2018-2024 - wouafpetitchien.com /